bootloader | An experimental pure-Rust x86 bootloader
kandi X-RAY | bootloader Summary
kandi X-RAY | bootloader Summary
An experimental x86_64 bootloader that works on both BIOS and UEFI systems. Written in Rust and some inline assembly, buildable on all platforms without additional build-time dependencies (just some rustup components).
 Support
 Quality
 Security
 License
 Reuse
Reuse
Top functions reviewed by kandi - BETA
Currently covering the most popular Java, JavaScript and Python libraries. See a Sample of bootloader
bootloader Key Features
bootloader Examples and Code Snippets
Community Discussions
Trending Discussions on bootloader
QUESTION
I have list of group name in the following file.
...ANSWER
Answered 2022-Apr-07 at 11:34Would you please try the bash script:
QUESTION
I have a bootloader that starts two docker-compose projects, with a command lines:
...ANSWER
Answered 2022-Apr-04 at 11:50Compose generally believes that, for whichever docker-compose -p project it's working on, the docker-compose -f Compose file names every container in the project. Compose doesn't track which file a container comes from, only which project it's associated with, and it can't operate on part of the files in a Compose project the way you show.
The first thing this means is that this sequence actually stops some containers:
QUESTION
Currently I'm working on a Demo program to better understand working with FreeRTOS. Therefore I would like to try to initialize a Queue on my second core(core1). After initializing i would like to add something to it in a 1 second interval and whenever nothing happens I would like to check my queue and work its content off. Everything related to that queue should work on the second core. The reason being that I previously worked on a Webserver which operates on the main core. My future Queue is supposed to work in parallel on the second core.
This is my current demoprogram:
...ANSWER
Answered 2022-Jan-14 at 16:52You don't need to assume where the problem is; the answer is in the backtrace that you posted. The exception happened during a particular function call in your code:
QUESTION
I have imx7d-pico with Carrier board. This tiny computer was used a lot for Android Things. PDF (datasheet) easily found.
I stay (during the last two weeks) trying this tutorial: https://github.com/TechNexion/freertos-tn/tree/freertos_1.0.1_imx7d
...ANSWER
Answered 2022-Apr-01 at 19:14I solved with two changes in device-tree files:
in imx7d.dtsi
I put status = "okay";
in rpmsg: rpmsg{
in imx7d-pico-pi-qca-m4.dts
I put:
reserved-memory {
rpmsg_vrings: vrings0@0x8ff00000 {
reg = <0x8fff0000 0x10000>;
no-map;
};
};
&
&rpmsg{
memory-region = <&rpmsg_vrings>;
vdev-nums = <1>;
reg = <0x9fff0000 0x10000>;
status = "okay";
};
QUESTION
i want to use Buttonless Dfu in flutter without any library , there is already one for Android+ios , but i wanted to implement for all platforms , so expecting that i can connect/read/write and set notifications by using ble , is there any tutorial or something if i can implement dfu by using these ble read/write and notifications only
or if someone can list setps like
write command 0x0... to enter in Bootloader
then when device is in bootloader
set notification for 0x0.... characteristics
and and send zip file to .... this char.
something like this ,it would be really helpfull
ANSWER
Answered 2022-Mar-27 at 12:58Entering the bootloader
To enter the bootloader using the Nordic Buttonless DFU you need to write to a characteristic of the Buttonless Secure DFU Service which uses the 16-bit UUID 0xFE59. The actual characteristic depends on your settings. The Buttonless DFU can be used with or without bonds and would show a different characteristic for either one. Take a look at the documentation for more information about that.
The protocol to enter the bootloader is super simple:
To enter the bootloader, you need to send 0x01 to the characteristic. You will receive a response telling you the result of the operation. The message sequence diagram shows a successful response which is made of
0x20 -> defines this message as response
0x01 -> the command you requested (enter bootloader)
0x01 -> Success
Take a look the the documentation for more response codes.
Sending the firmware update
There is a very detailed page about the DFU protocol including a part especially about using BLE. It includes a message sequence chart describing the actual protocol where you can easily see in which order your messages need to be sent and to which characteristic.
QUESTION
I'm correctly generating my image Yocto-hardknott-technexion with this:
...ANSWER
Answered 2022-Feb-16 at 16:34The solution was to change imx7d-pico-pi-m4.dtb to imx7d-pico-pi-qca-m4.dtb in the Yocto/Hardknott/technexion configuration file called pico-imx7.conf(described in the post)
QUESTION
I am trying to create an executable version of python script that predicts images using .h5 file. The file runs completely fine when on its own in the virtual environment. But when I run the exe after completing the hidden imports following this and data addition in .spec file, when I run the exe it gives the following error:
ANSWER
Answered 2021-Aug-08 at 23:03Since the error is caused by keras in particular, I replaced it with tensorflow.keras.* and seemed to resolve the issue.
QUESTION
I am a total newb, I just started looking into this today. I have a a chromebook running chrome Version 96.0.4664.111 (Official Build) (64-bit), and a raspberry pi pico which I have loaded python bootloader on (drag & drop). I am trying to access the pico from my browser serially to load my source code since I cannot install thawny on my chromebook. I have pieced together this javascript function that uses web serial api to connect to the pico.
...ANSWER
Answered 2022-Jan-06 at 12:26I have found a suitable solution to my question, tinkerdoodle.cc.
QUESTION
Looks like I broke my NodeMCU Lolin esp8266 module, please confirm)
Firstly everything worked fine, but then...
- I uploaded a bit strange
boot.pyto play with UART0
ANSWER
Answered 2021-Dec-03 at 09:48It's more likely that you are experiencing hardware related issues than software related issues as you imply yourself.
Re-solder the part that broke off and try again. You probably broke of a resistor/capacitor that is used for noise filtering the output (I am not a hardware guy) or something that is vital to regulating the voltage required for the board to operate.
EDIT
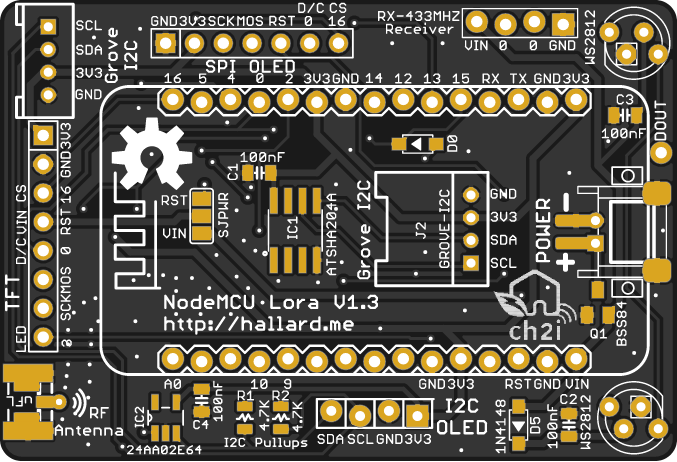
As indicated by: https://raw.githubusercontent.com/hallard/NodeMCU-Gateway/master/pictures/NodeMCU-Lora-Gateway-top.png it seems, albeit that board is of a different design, that you broke off a capacitor or diode. Either resolder or get yourself a new one (100nf) or a diode (1N4148)
QUESTION
I can not get ld to link a very simple program because of a truncated relocation.
...ANSWER
Answered 2021-Dec-02 at 18:44So I figured out my problem!
I missed a . in a symbol name.
Community Discussions, Code Snippets contain sources that include Stack Exchange Network
Vulnerabilities
No vulnerabilities reported
Install bootloader
The builder binary is a small command line tool that takes the path to the kernel manifest and binary as arguments. Optionally, it allows to override the cargo target and output dirs. It also accepts a --quiet switch and allows to only build the BIOS or UEFI binary instead of both.
After parsing the arguments, the builder binary invokes the actual build command for the BIOS/UEFI binaries, which includes the correct --target and --features arguments (and -Zbuild-std). The kernel manifest and binary paths are passed as KERNEL_MANIFEST and KERNEL environment variables.
The next step in the build process is the build.rs build script. It only does something when building the BIOS/UEFI binaries (indicated by the binary feature), otherwise it is a no-op. The script first runs some sanity checks, e.g. the kernel manifest and binary should be specified in env variables and should exist, the correct target triple should be used, and the llvm-tools rustup component should be installed. Then it copies the kernel executable and strips the debug symbols from it to make it smaller. This does not affect the original kernel binary. The stripped binary is then converted to a byte array and provided to the BIOS/UEFI binaries, either as a Rust static or through a linker argument. Next, the bootloader configuration is parsed, which can be specified in a package.metadata.bootloader table in the kernel manifest file. This requires some custom string parsing since TOML does not support unsigned 64-bit integers. Parse errors are turned into compile_error! calls to give nicer error messages. After parsing the configuration, it is written as a Rust struct definition into a new bootloader_config.rs file in the cargo OUT_DIR. This file is then included by the UEFI/BIOS binaries.
After the build script, the compilation continues with either the bin/uefi.rs or the bin/bios.rs: The bin/uefi.rs specifies an UEFI entry point function called efi_main. It uses the uefi crate to set up a pixel-based framebuffer using the UEFI GOP protocol. Then it exits the UEFI boot services and stores the physical memory map. The final step is to create some page table abstractions and call into load_and_switch_to_kernel function that is shared with the BIOS boot code. The bin/bios.rs function does not provide a direct entry point. Instead it includes several assembly files (asm/stage-*.rs) that implement the CPU initialization (from real mode to long mode), the framebuffer setup (via VESA), and the memory map creation (via a BIOS call). The assembly stages are explained in more detail below. After the assembly stages, the execution jumps to the bootloader_main function in bios.rs. There we set up some additional identity mapping, translate the memory map and framebuffer into Rust structs, detect the RSDP table, and create some page table abstractions. Then we call into the load_and_switch_to_kernel function like the bin/uefi.rs.
The common load_and_switch_to_kernel function is defined in src/binary/mod.rs. This is also the file that includes the bootloader_config.rs generated by the build script. The load_and_switch_to_kernel functions performs the following steps: Parse the kernel binary and map it in a new page table. This includes setting up the correct permissions for each page, initializing .bss sections, and allocating a stack with guard page. The relevant functions for these steps are set_up_mappings and load_kernel. Create the BootInfo struct, which abstracts over the differences between BIOS and UEFI booting. This step is implemented in the create_boot_info function. Do a context switch and jump to the kernel entry point function. This involves identity-mapping the context switch function itself in both the kernel and bootloader page tables to prevent a page fault after switching page tables. This switch step is implemented in the switch_to_kernel and context_switch functions.
As a last step after a successful build, the builder binary turns the compiled bootloader executable (includes the kernel) into a bootable disk image. For UEFI, this means that a FAT partition and a GPT disk image are created. For BIOS, the llvm-objcopy tool is used to convert the bootloader executable to a flat binary, as it already contains a basic MBR.
Support
Reuse Trending Solutions
Find, review, and download reusable Libraries, Code Snippets, Cloud APIs from over 650 million Knowledge Items
Find more librariesStay Updated
Subscribe to our newsletter for trending solutions and developer bootcamps
Share this Page